The Neo Amish
Culture • Lifestyle • Preparedness
Building a culture of self sufficiency, personal responsibility, and moral courage.
Interested? Want to learn more about the community?

Learn more first
Hiatus Over, NAP is back and declaring unrestricted war!

It's been a minute but we're back in action. An unexpected move and job swap, but here we are. I'll be making a full video soon discussing some lessons learned in the garden planning and planting that we did this spring, but for now I want to focus on a more narrow topic: varmints.

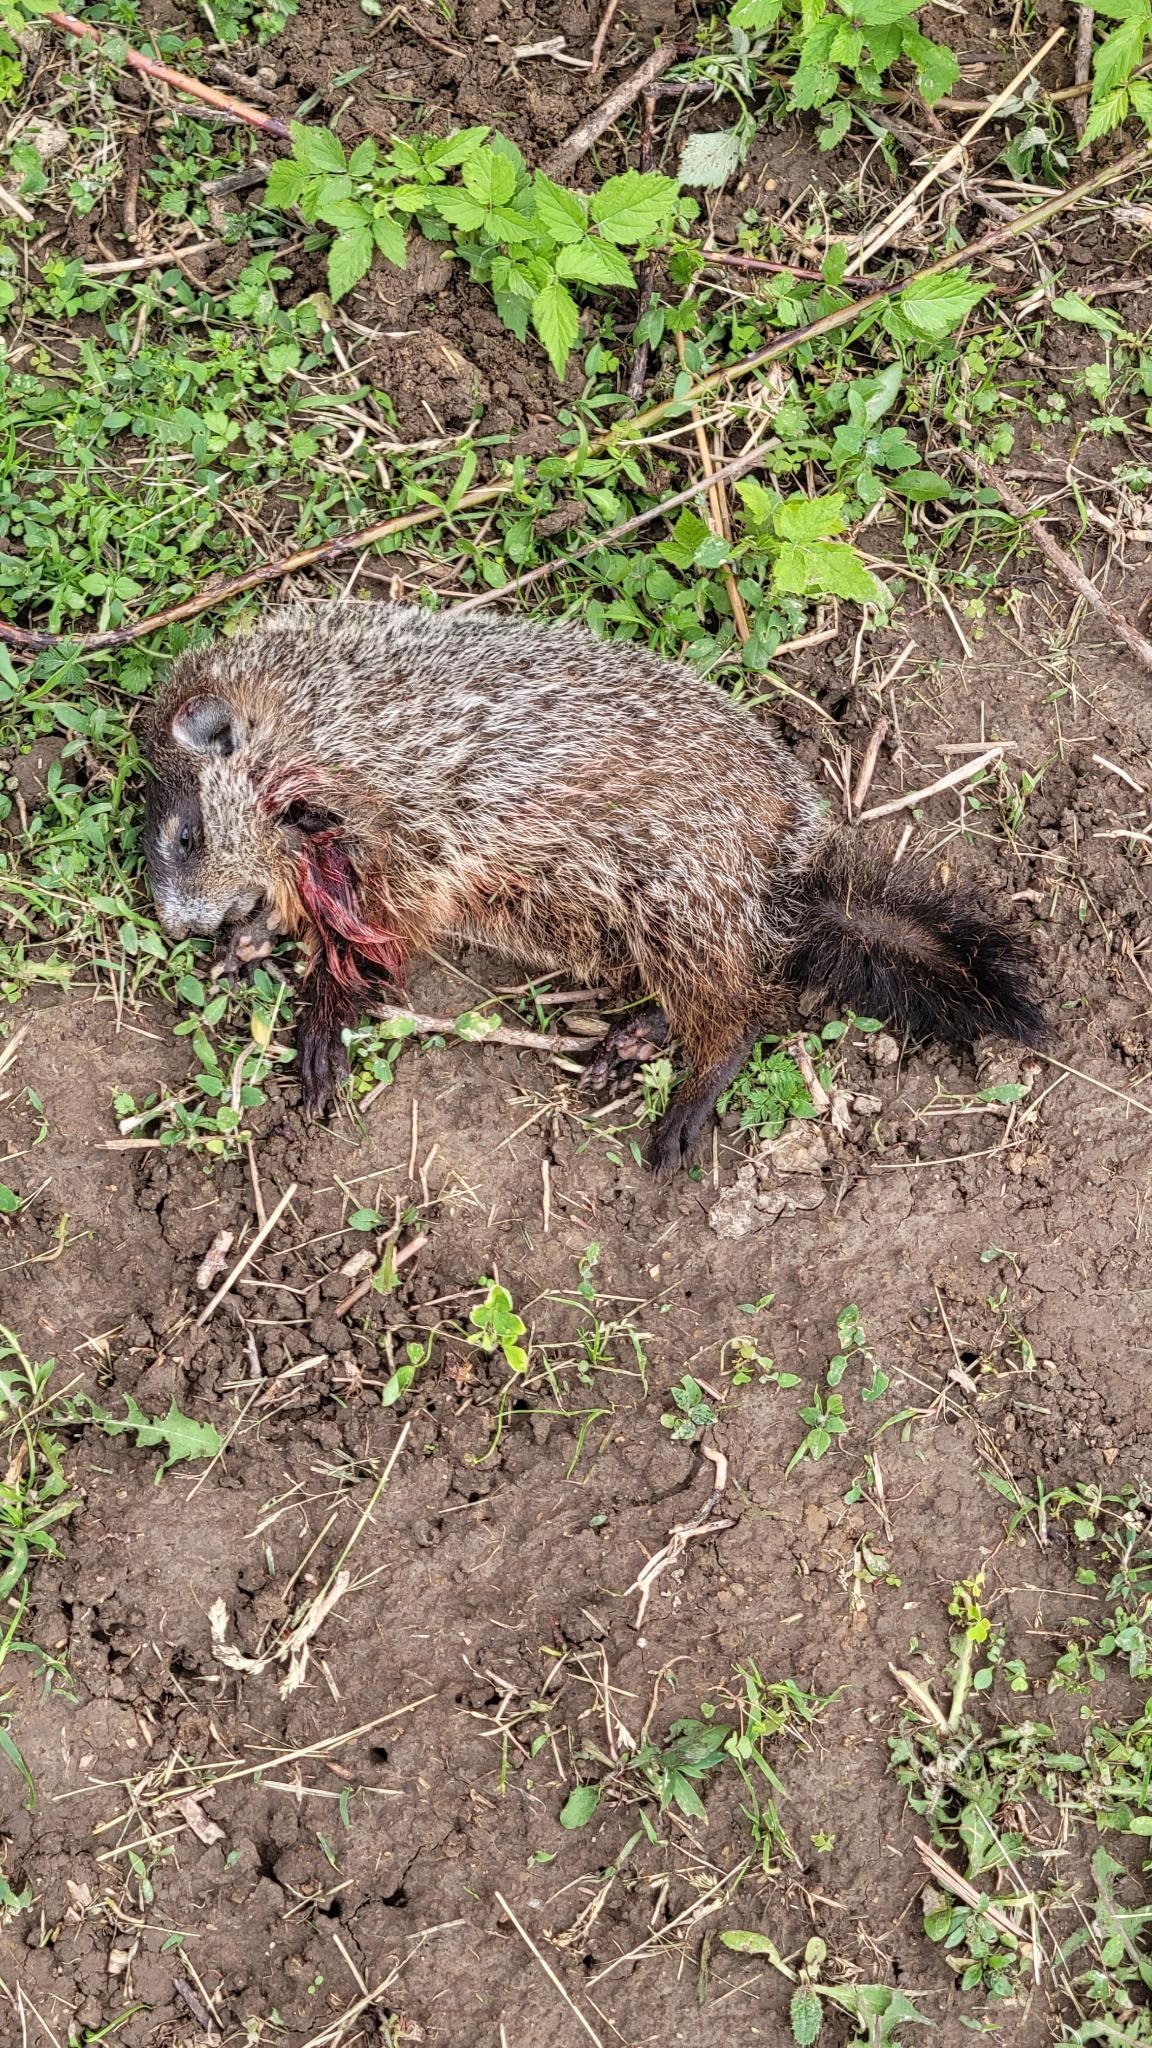
When choosing a location for our garden we were a bit limited. The spot we chose has several buildings and we were aware of a groundhog that came out in that area several times a day. The garden went in, we kept an eye out, the groundhog was terminated. What we didn't anticipate was the groundhog having 4 babies that were previously confined to the den. Once they got hungry enough they emerged and began foraging in the area immediately next to the garden. The race to kill them off before they found our plants was on.

3 methods have been implemented and each has been only somewhat effective. There are people who claim feeding groundhogs double bubble gum will kill them. They chow it down by the bag but it hasn't killed any that I have witnessed. The second method I attempted was offering poison worms (intended for moles). I placed 4 worms at the entrance of their tunnels. 2 disappeared and 2 were thrown about and never touched again. After a few days, it was clear that 4 of 4 babies were still alive and well. This brings us to the last method of removal: shooting them.

I've used my AR for these tiny terrorists primarily because it's the only firearm I have handy at the moment. Shooting groundhogs with a .223 should be a pretty straightforward affair, but unfortunately this has not been the case for me. The location of the garden and proximity of a feedlot, horses, house, and shed mean that getting a clear shot on these boogers is very limited. Additionally, most of the ammo I have is not designed to pick off small animals. If you've ever fired tracers you may know this, but .223/5.56 have a pretty nasty habit of bouncing. Lot of factors can contribute to this, but when shooting (even into dirt) it's important to understand how damn unpredictable that bullet can be after you send it.

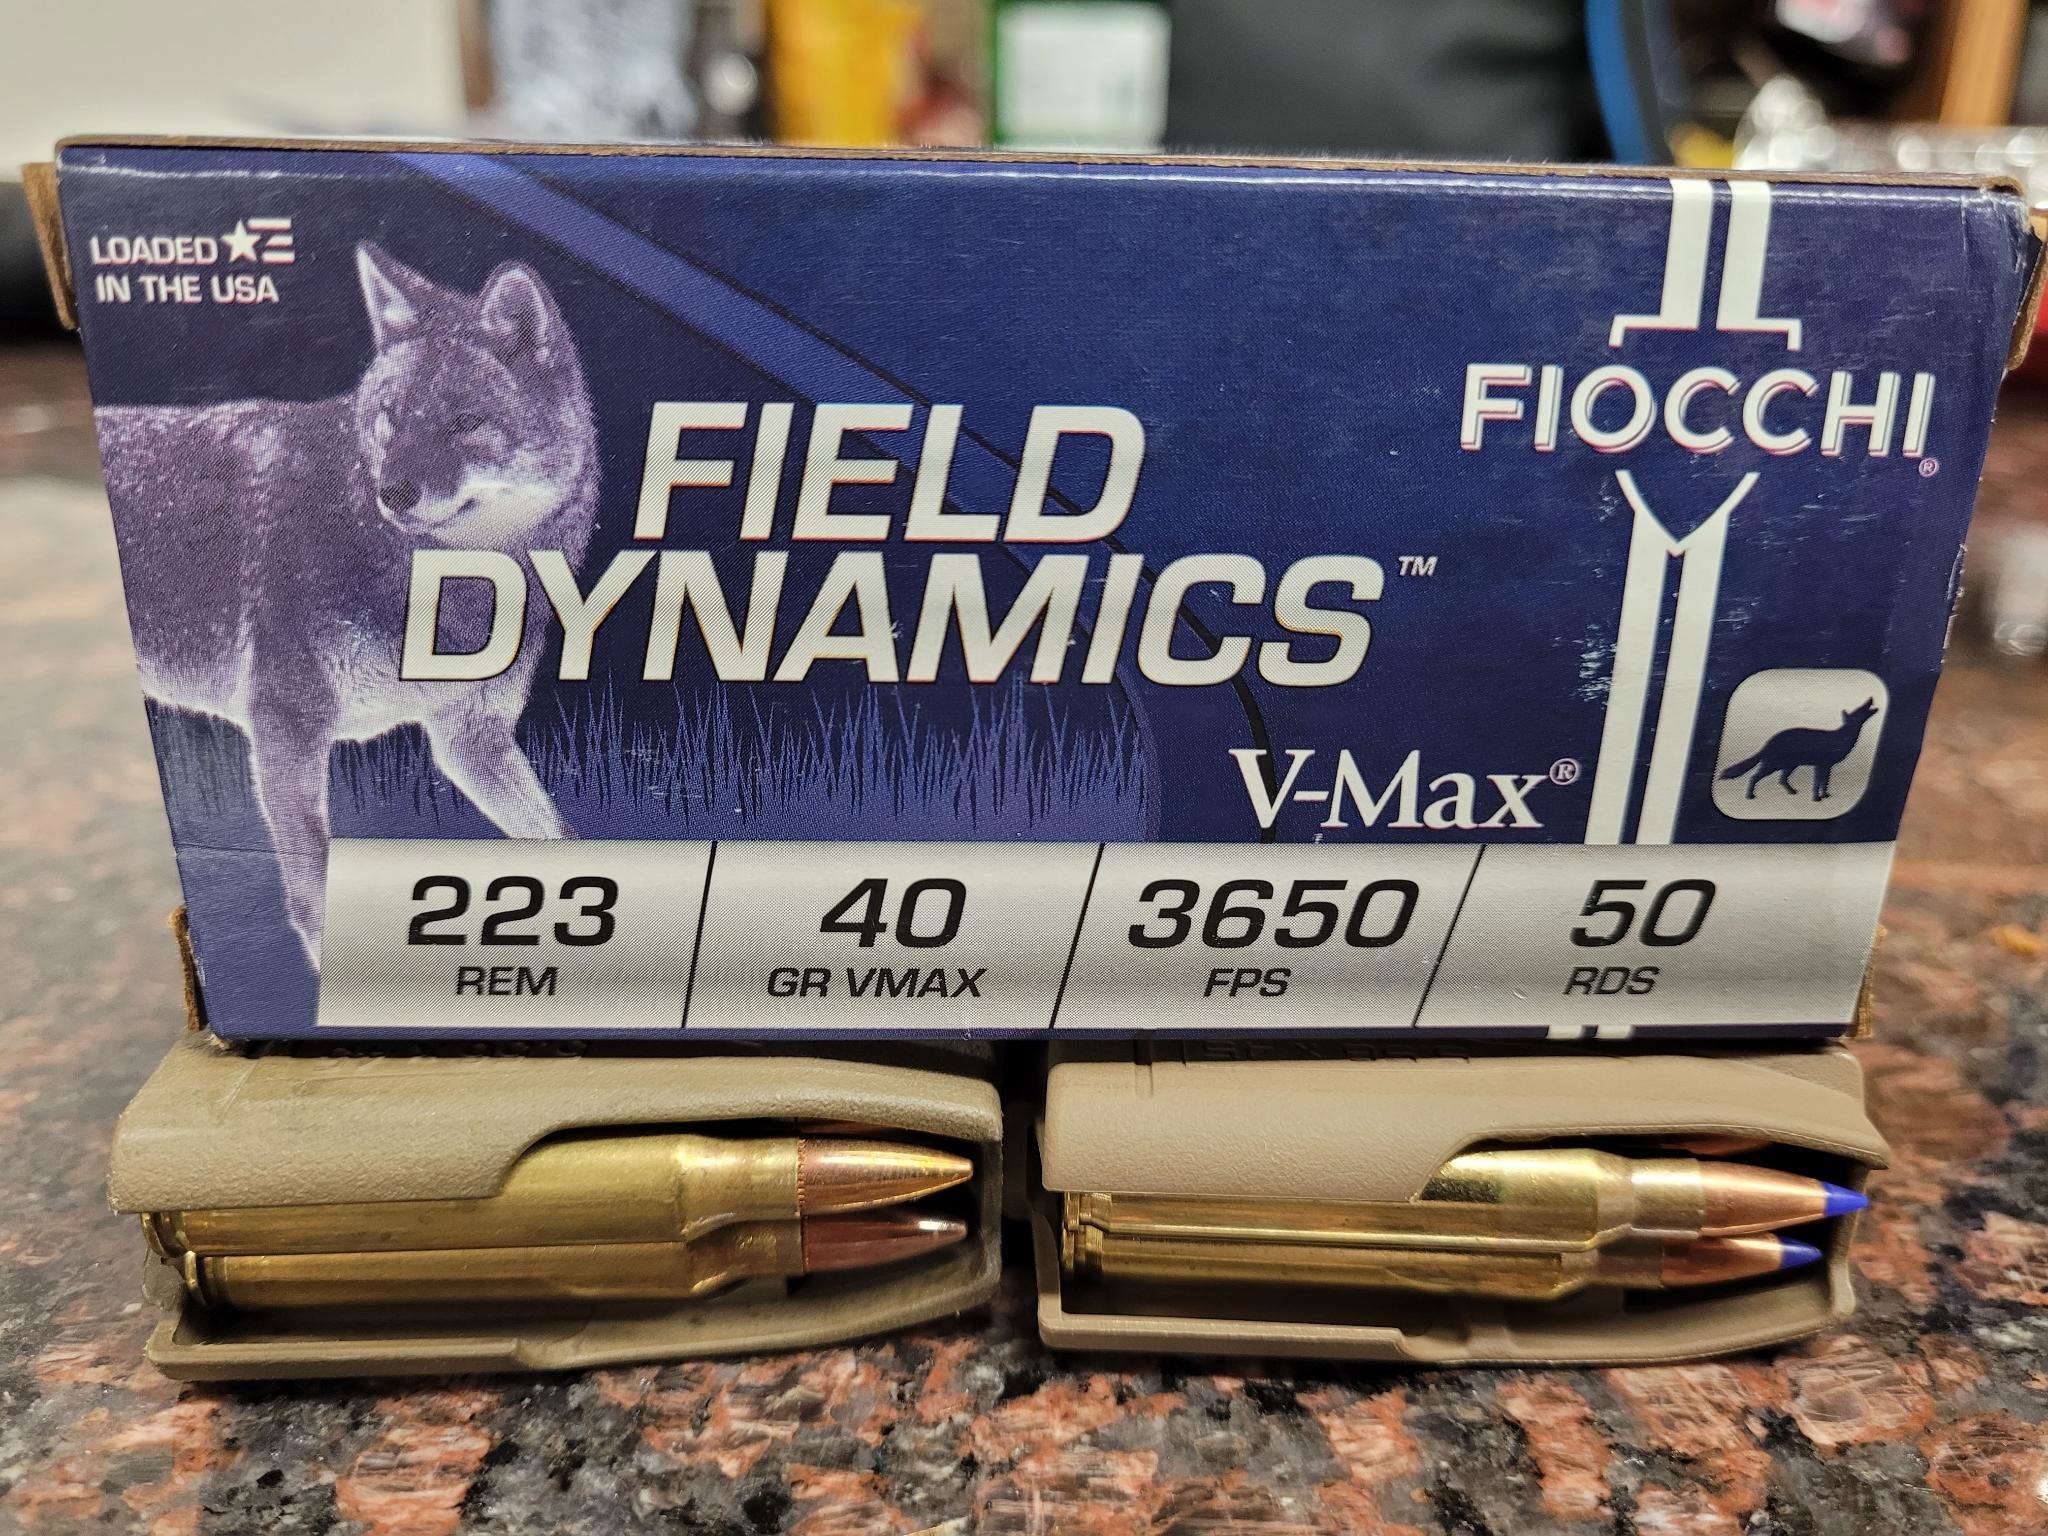
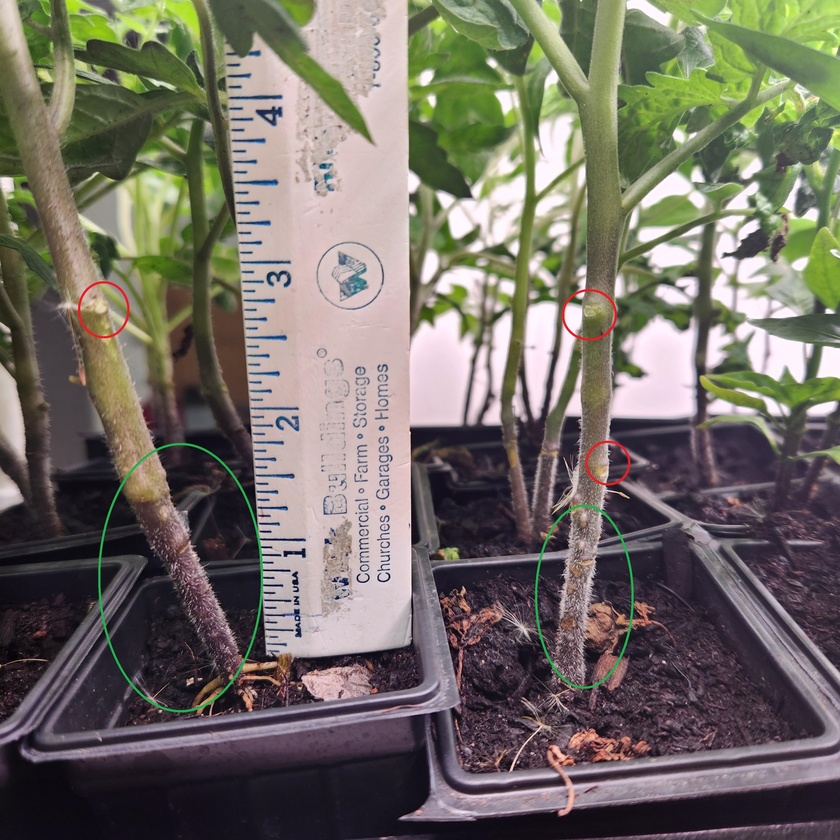
When shooting varmint number 3 of 5 it was right along side my (woman's) prized tomatoes. The bullet hit its intended target, bounced, and tumbled straight through the center of a tomato stalk, effectively slicing it in half. Pictures below show the key-hole and fragmentation in the can that was around the base of the plant, along with a screen shot of the conversation breaking the news to my future wife. Spoiler: she hasn't left me yet. The moral here is get the right tool for the job. In this case the remedy for me is swapping ammunition. I'm going from 55gr FMJ to a 40gr polymer tip round (pics included).

The next issue I experienced is one that is completely my own fault. Training is important for a reason. If you aren't knowledgeable about your gear, you can't expect it to always perform the way you want it to. In this case, this particular rifle is not one I regularly fire. I added a Vortex strike eagle on it last year, zeroed it as best I could at a 25 yard range and haven't touched it since. When it was time to shine, I ended up wounding 2 animals terribly.

I'm no bleeding heart hippy but when you drop the hammer on a creature it's your responsibility to kill that animal quickly. I failed at that which has motivated me to make some serious improvements: Confirming zero frequently, practicing the fundamentals, and ensuring I know my surroundings well enough to confidently and effectively engage a target without fear of any further collateral damage. I could make excuses and say that rifle was supposed to be a competition gun. It is. That does not excuse my lack of practice with it before using it on a living creature.

Conclusions:
1. Pests are a part of the farming game. Build in redundancy to protect your assets.
2. Know your target, what's beyond it, around it, and plan for the fact your bullet may go somewhere you didn't intend.
3. Right tool for the right job helps mitigate issues.
4. Groundhogs love bubble gun. If it doesn't kill them, it's still decent bait.
5. Poison products may or may not work. I don't like them because it seems very loose and uncontrolled.
6. A groundhog, tin can, and tomato stalk are not enough to stop a .223 or break an engagement.

Interested? Want to learn more about the community?

Learn more first
What else you may like…
Videos
Posts
Articles
Shake what Mother Nature gave ya!
00:00:30
What is the Neo Amish Podcast all about?

Welcome to the movement!

00:03:14
30" Bed Ergonomics

This year I wanted to try out 30" in ground beds in the garden. One of the big things market gardeners preach is the ergonomics of this style. I definitely felt awkward planting in this position but within minutes things got smoother, faster, and more comfortable. A few notes: I think after planting 25' (my current bed length) like this I'd want a break. I'm also pretty tall and straddling the beds was a stretch. If you're less vertically gifted I could see this being a struggle. Having a second person around to swap out flats while you plant is very helpful. You can get in a rhythm and move fast. Keeping consistent spacing takes a bit of practice. Use your tools/trays to help estimate spacing and keep things consistent as you go.

post photo preview
Building Your Own Handbook, lessons from the Urban Farmer

I've never been known for having a stellar memory. I've never been accused of being hyper organized. If you're gardening for a hobby, you can make errors and wing it. If your goal is providing a sustainable source of food for your family, or making your garden a business venture, winging it won't cut it. A trend that I've noticed with Curtis Stone is his precision in everything. Knowing exactly how a crop should perform allows him to rapidly identify deficiencies, plan what crops to plant, and adapt to market demand. He does this by using several excel sheets and continually documenting crop performance. As a noob, having a spread sheet to rapidly identify potential issues or adapt a plan, could make or break my season. I've attached the spreadsheets as examples of my working "Grow Sheets". As I continue, I'll adapt them to include whatever information is essential to a successful season. I encourage others who are working to become more self sufficient to do something similar.

...

Garden Totals and Optimism About Next Season

The garden continues to produce but since we're nearing the end of the season, I should do some number crunching to encourage anyone looking to gardening next year. Below I've listed quantities, crop notes, and prices of those goods at the local grocery store. This list will be updated later in the season due to incomplete data but my current totals or estimates: Garden size 20'x30'

Cherry Tomatoes:
Market Price $4.96/lb
Produced- 10 lbs Still producing
Notes- Black cherry and Candy-land, low maintenance, solid producer, great flavor.

Sauce Tomatoes:
Market Price $0.98/lb
Produced- 20lbs Still producing
Notes- Roma VF and San Marzano from seed Burpee seed

Green Beans:
Market Price $1.76/lb
Produced- 5 lbs
Notes- Planted pole beans after bush bean failure, still producing heavily

Asparagus:
Market Price $6.72/lb
Produced- NA 5 lbs
Notes- Collected wild

Yellow Squash:
Market Price $1.48/lb
Produced- 60 lbs
Notes- Heavy Producer, low maintenance, loved hot weather

Zucchini:
Market Price $1.48/lb
Produced- 50 lbs
Notes- ...

post photo preview
Sunset Italian Peppers
A Superior Alternative to Bell Peppers

Bell peppers are awesome but $1.00-1.50 per pepper is outrageous. They're expensive because they are input intensive and not hyper productive plants. Naturally, instead of paying for peppers, I wanted to grow my own. This led me to discover a variety of pepper from True Leaf Market, the "Sunset Italian Pepper- sweet". 

I started mine along with my other peppers (cayenne, habanero, and jalapeno)  early April. They grew quickly compared to other varieties. When I potted them up to 3”x3” pots, I sprinkled a small amount of Dr Earth’s organic fertilizer and transplanted them in late May. I used a mix of Dr Earth’s and Tru-Organics fertilizer throughout the season and each plant responded well. The peppers mature into a variety of colors. I got yellow, orange, and red peppers averaging 4-6”. The flesh of the pepper is medium thickness (in between a bell pepper and the small snack peppers) easy to deseed, and has a mild sweet flavor. The 3 plants I have produced 2-3 mature peppers per week which was easily enough to make several batches of stir fry.  If you’re interested in or currently growing bell peppers I’d recommend giving this variety a try. 

Link to TrueLeaf: 

https://www.trueleafmarket.com/products/organic-sweet-sunset-italian-pepper-mix

Read full Article
post photo preview
Rendering Fats at Home
Because Seed Oils Are Fake News

If you’re ready to end your dependence on seed oils you’ve come to the right place. Rendering fat at home is a simple process that can be done without specialty tools. I render both beef and pork fats (tallow and lard) at home to use in place of vegetable oil. Check out this beginners guide to rendering fats at home: 


  1. Buy raw fat from your local grocery store or butcher. I purchase my fats from a local butcher in bulk. A 5 lb pack costs around $10 and will yield about half a gallon of finished product. I recommend keeping this frozen until you’re ready to use it.

  2. Slice and dice! I partially thaw my fat and then use a large knife to shave small pieces off the still firm block. By reducing the size of the pieces you’ll speed up the process of melting down. Note: Fat has a low melting temp and even the heat from your hands will tend to turn a frozen block of fat into a slippery blob. Work quickly, wear gloves to keep things clean, and don’t stab yourself.
  3. Cook your trimmings. I use a crockpot on low heat. Low and slow is the name of the game. It’s helpful to add a small amount of water (¼ cup) to the bottom when you first begin rendering the fat. This will help prevent scorching early on.

  4. Stir and wait. Within a few hours you’ll begin to see the fat liquify. The key at this point is to monitor for any bits that are browning and scoop them out. Browning will cause your finished product to have a stronger flavor. Note: Stirring at this stage can cause the fat to boil rapidly.

    Notice the water boiling off and fat browning on bottom left edge
    Notice the water boiling off and browning along bottom left edge.
  5. Strain the remnants. When the majority of your fat has melted into a clear yellow liquid you’re getting close (a full crockpot usually takes 10-12 hrs for me). You can begin straining the solids from your fat. I use a wire strainer first then add a coffee filter or cheesecloth to remove any remaining fine particles.

    The large pieces of fat have almost completely melted leaving the clear yellow lard behind.
  6. Ensure all water is evaporated. I recommend straining your liquid fat into a large saucepan for this step. Keep the fat on the stove over low heat and stir frequently until no more bubbles form. Water when heated creates steam and forms bubbles. No more bubbles means no more water and you’re good to go.

  7. Let the fat cool and package. After cooling slightly I pack my tallow and lard in pint jars and keep them in the freezer for long term storage. It should solitify at room temperate into a mild smelling white solid. Rendered fat is shelf stable but to prevent the possibility of it going rancid, sacrificing a bit of freezer space isn't that bad. I also refrigerate opened containers with the lid on to prevent any off flavors absorbing in the fridge.

    Enjoy not frying your food in motor oil!


Read full Article
post photo preview
Pre-Planting Prep for Indeterminate Tomatoes

A few things to start. There are two broad types of tomato plants, determinate and indeterminate. Determinant tomatoes grow to a certain size and then stop growing. Indeterminate tomatoes will grow continuously throughout the season (FR FR no cap). Determinant tomatoes generally should not be pruned. I select indeterminate varieties because I want to maximize production.The downside to this is they get massive. If you’re low on space, they can easily overrun other plants and crush weak support structures. We don’t play that weak tomato game out here. If you’re wanting to bump your rookie numbers, try out the following with your indeterminates:

Prune lower leaves and allow the wound to heal: Below you will see a close up of my current tomato plants. Several weeks ago they were potted up into 2”x2” pots with a potting mix and dusting of organic fertilizer. They have doubled in size, I’ve rotated them outside to harden them off (acclimate them to the sun and outdoor temp shifts), and they are ALMOST ready to go in the ground. The last thing I do before I plant is prune the lower leaves. This allows me to plant the tomatoes several inches deeper in their permanent home. In red you can see several places where I have clipped leaves. The wounds will scab over in a few days. In green you can see the hairlike fibers above the soil line. These, if planted below the soil line, will become roots. In their current pots, these plants have about 2.5” of root system below the ground. Trimming the lower shoots and planting deep will effectively double the area of the root system. Since these plants will grow continuously through the season, it's a small setback that will pay serious dividends later on. 

Read full Article
Available on mobile and TV devices
google store google store app store app store
google store google store app tv store app tv store amazon store amazon store roku store roku store
Powered by Locals